
Introduction to React
React is a JavaScript library created by Facebook. It is also used by Netflix and Instagram. It is used to create JS-Driven dynamic web apps. Other similar JavaScript frameworks are Angular and Vue.
How React Works
All different functionality, parts of the web application are put into components. React takes code for all these components and injects them in the DOM (which stands for Document Object Model). The browser renders this DOM, which we see as a web page in the browser. React first takes all the different components and creates a virtual DOM. This DOM is then sent to the actual DOM (in the browser).
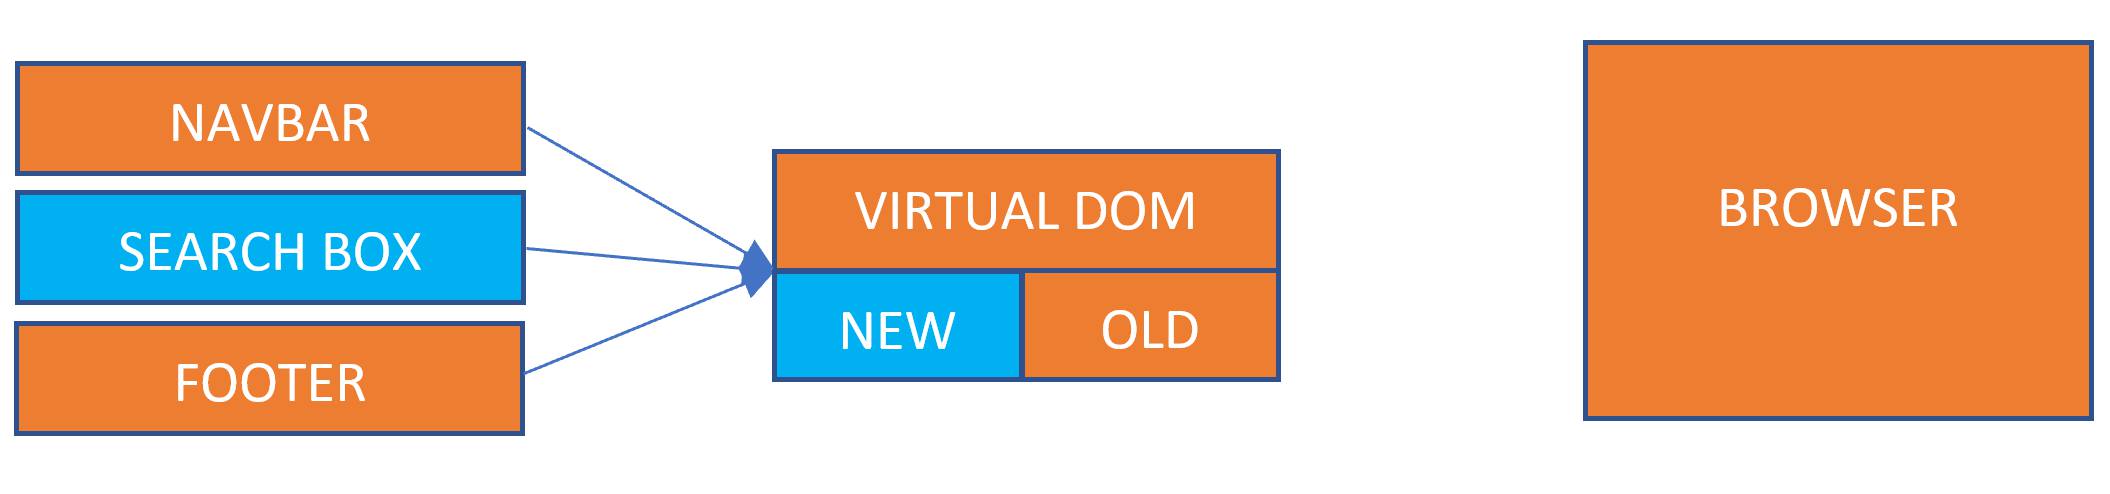
Whenever a change is made in one of the components, react compares it with the older version of the virtual DOM and only sends the changes to the actual DOM.
A component is a dynamic html code snippet -
- looks like an html template (actually this is JSX, JS representation of html).
- may also contain a state (i.e. data or UI state)
- can also perform JavaScript functionality such as functions, mathematical operations etc.
Using React from CDN
You can use a package called Create-React-App for full-fledged react application. This package installs both React and React-DOM. Or to get quickly up and running you can also use the CDN (Content Delivery Network) version. The CDN version too contains both of these packages. However, as code for a CDN is loaded from an external server, the CDN version is only useful for small sections or widgets of a web page. The CDN version is useful when you want to save the effort of installing React natively on the server.
To demonstrate React functionality from the CDN version, first create a basic html page and save it as index.html. If you are using VSCode, you can create the basic html boiler-plate by typing doc and hitting tab (you may need to setup Emmet before doing so). The basic html code would look like below.
<html lang="en">
<head>
    <meta charset="UTF-8">
    <meta name="viewport" content="width=device-width, initial-scale=1.0">
    <meta http-equiv="X-UA-Compatible" content="ie=edge">
    <title>Document</title>
</head>
<body>

</body>
</html>
Goto https://reactjs.org/docs/cdn-links.html and copy the text at the top as below.
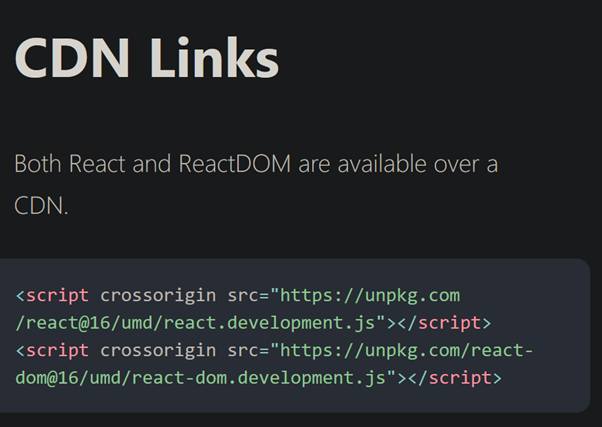
Paste this code inside the head tags, in between the meta and title tags.
Next inside the body tags, create a new div container with and id of “app”. This would look like below.
<div id="app">
</div>
Create First React Component
We would create a component to take control of the div created above called ‘app’. Below the div, create a script tag. The component would be a class based component in js. Since this is within the script tags, we can write js within it. Within the script tag, create a class called App which inherits from the React Component parent class. This particular class has a method/function called render which would return a rendered jsx template (js based dynamic html). So for our example, within the return statement, we write the following jsx ‘Hi Scripters’ within html h1 tags within a div container. Note that for jsx, although it looks like html we always need to have at least one container type element such as div at the root level. We give our root level div a class name of “app-content”. Note that in jsx unlike html we need to use the word “className” for our html tags instead of “class”.
To send this jsx to our div (called app) above we need to use the ReactDOM.render method. This method has two arguments. The first argument is the component. The way this component is referenced is using the name of the component within html ending tags. In our case, the component is a class called App so our first argument is <App />. The second parameter is where we want to render the component to the DOM. So the second argument is “document.getElementById(‘app’)”. We would call this React.DOM.render method just below our component in the script tags. See example below:
  <body>
    <div id="app"></div>
    <script>
      class App extends React.Component {
        render() {
          return (
            <div>
              <h1> Hey Scripters</h1>
            </div>
          );
        }
      }
      ReactDOM.render(<App />, document.getElementById("app"));
    </script>
  </body>
Since we are using the CDN version of React, before testing the above in our browser, we need to install a plugin which converts the JSX to html. We use a tool called Babel. Go to https://babeljs.io/ , go to the setup page, and in the browser (https://babeljs.io/setup#installation) , grab the script tag as shown below,
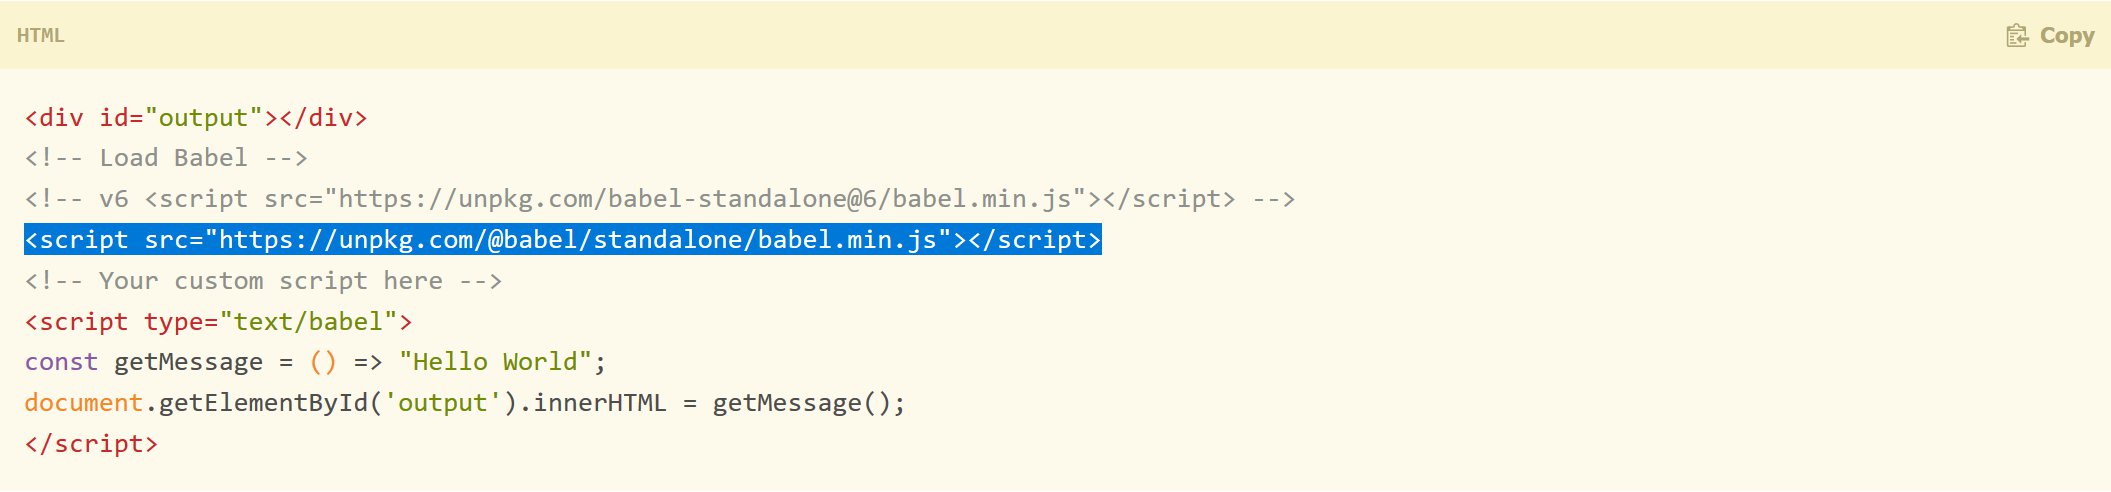
and paste that right above the React CDN script tags in the header tags of our index.html page before. We also need to modify our script tag which contains our react component with a type = “text/babel” as shown below.
  <body>
    <div id="app"></div>
    <script type="text/babel">
      class App extends React.Component {
        render() {
          return (
            <div>
              <h1> Hey Scripters</h1>
            </div>
          );
        }
      }
      ReactDOM.render(<App />, document.getElementById("app"));
    </script>
  </body>
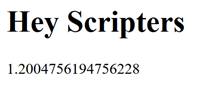
Now we are ready to test our first react component. If you open the html page in your browser, you would see the message “Hey Scripters”.

So that’s our first working react component.
The above component was displaying just static content. But we can easily put some other JavaScript to display dynamic content. To put dynamic js within jsx we need to put that within curly braces. Below our h1 tags put a js Math.random() function within curly braces in a p tag. So if we modify the script tag within the body tag like below
<script type="text/babel">
      class App extends React.Component {
        render() {
          return (
            <div>
              <h1> Hey Scripters</h1>
              <p>{Math.random() * 10}</p>
            </div>
          );
        }
      }
      ReactDOM.render(<App />, document.getElementById("app"));
</script>
and refresh the index.html page in the browser we would see a random number multiplied by 10 in the browser.
State
State represents the state of the data or UI of a component. State allows to store this information locally. We can add state to the component we created above, simply by adding a state property to our App class. The state is a JavaScript object. For this example, we define the state as a js object of name and DOB. So our component looks like below.
class App extends React.Component {
    state = {
      name: "Michael Scofield",
      DOB: "September 8, 1978"
    };
    render() {
      return (
        <div>
          <h1> Hey Scripters</h1>
          <p>{Math.random() * 10}</p>
        </div>
      );
    }
  }
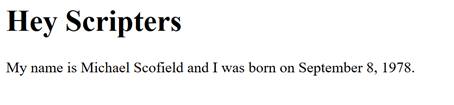
To demonstrate how the state object could be used dynamically, we render the state object variables – name and DOB by referencing them with this.state.name and this.state.DOB in our p tag as below.
class App extends React.Component {
    state = {
      name: "Michael Scofield",
      DOB: "September 8, 1978"
    };
    render() {
      return (
        <div>
          <h1> Hey Scripters</h1>
          <p>
            My name is {this.state.name} and I was born on {this.state.DOB}.
          </p>
        </div>
      );
    }
  }
Now if we refresh our browser, we should see the below.
React Developer Tools
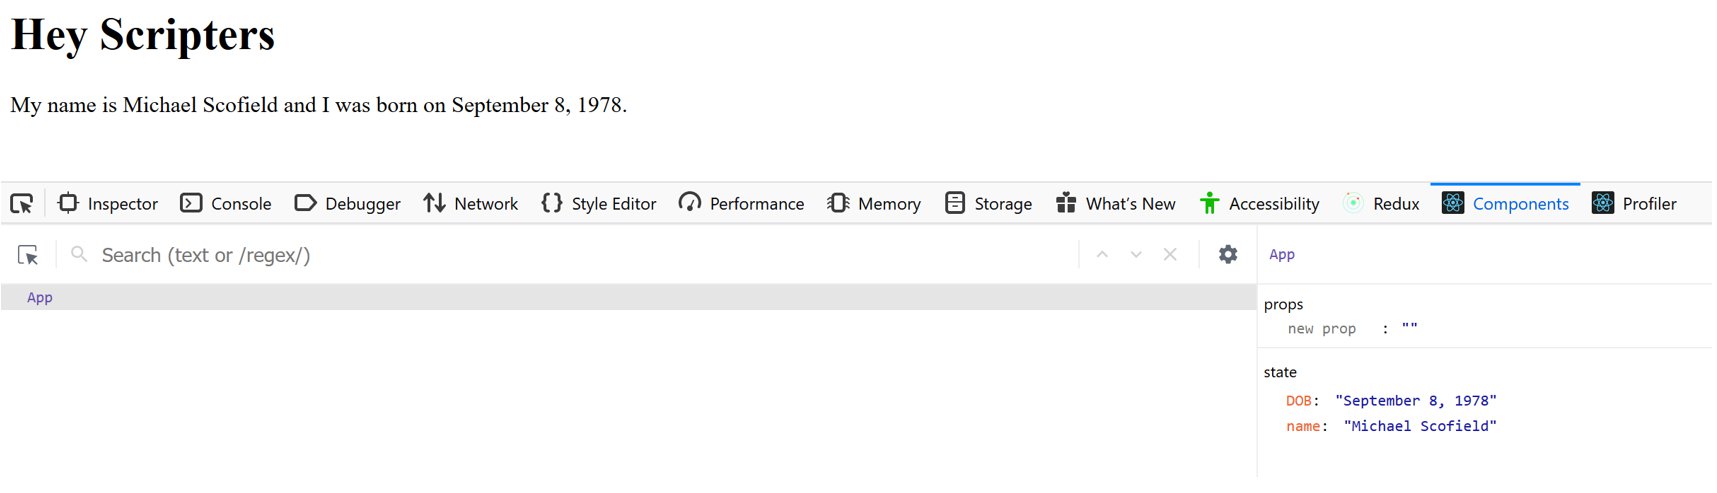
It is recommended that we install this browser plugin to see the state of our react components in the browser’s developer tools. This plugin is available for both Chrome and Mozilla Firefox. I am using Mozilla for the demonstration. Once you install the plugin, Press ‘Ctrl+Shift+I’ on the browser and that would open the browser’s developer tools option. On the developer tools console, you should be able to see the React ‘Components’ and ‘Profiler’ tabs. If you navigate to the ‘Components’ tab and click on the ‘App’ you should be able to see the state of the app as below.
On the React Dev tools, if you wish, you could also change the value of the state variables and see the browser rendering different values as per the state values.
Change component state on user event
There are various ways of achieving this based on user interaction. For simplicity we would just show how this could be done by a user mouse click event through a button. First we define a function which would be executed when a user clicks a button. We define a new method called UserClick, for our component. This method would set the name parameter of our state as ‘Lincoln Burrows’ and DOB as 17 March 1970. The class method is constructed like an arrow function which takes a special argument ‘e’ and looks like below.
userClick = e => {
    this.setState({ name: "Lincon Burrows", DOB: "17 March 1970" });
  };
In the above, we take an arrow function so that it can capture the ‘this’ object of it’s parent context. Also, to change the state of a component the setState is the recommended method.
Now we need to call this method from somewhere. To call this based on user interaction, we create a button called ‘Click Me’ below our message in the browser. When a user clicks this button, the state of the component updates, and the message too updates to show the new state without reloading the page.
<p>
    My name is {this.state.name} and I was born on {this.state.DOB}.
</p>
<button onClick={this.userClick}>Click Me</button>
In the above, we call the method using this.userClick, which would update the component state on the button event onClick. We don't need to pass this argument 'e' while calling the method. This 'e' argument in any class method of the component automatically takes in all events without being passed exclusively.
The full component looks like below.
class App extends React.Component {
    state = {
      name: "Michael Scofield",
      DOB: "September 8, 1978"
    };
    userClick = e => {
      this.setState({ name: "Lincon Burrows", DOB: "17 March 1970" });
    };
    render() {
      return (
        <div>
          <h1> Hey Scripters</h1>
          <p>
            My name is {this.state.name} and I was born on {this.state.DOB}.
          </p>
          <button onClick={this.userClick}>Click Me</button>
        </div>
      );
    }
  }
Now if we refresh the page we would see a button called ‘Click Me’. If we press this button we would see the message getting updated.
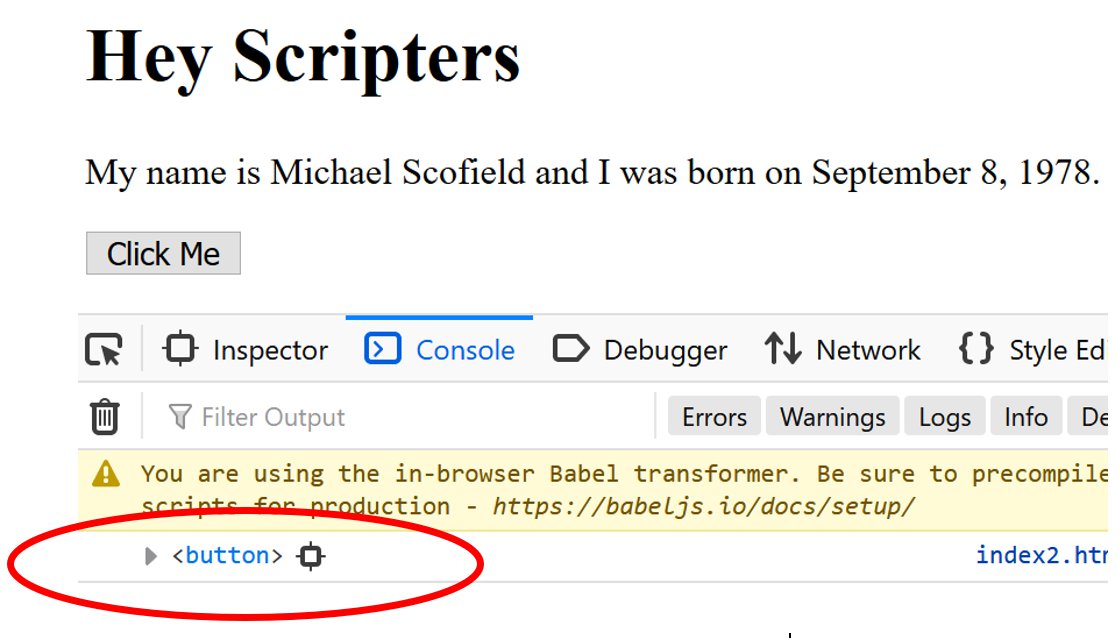
As discussed we didn’t need to pass the event ‘e’ exclusively. This is because all events are automatically passed to the component class methods with the argument name ‘e’. To see an example use of this, we can use the e.target method to find out the object from where the event was triggered.
First add the 'userMouseOver' function to our React 'App' component above.
userMouseOver = e => {
  console.log(e.target);
};
Then add the 'onMouseOver' event to our button as shown below.
<button onClick={this.userClick} onMouseOver={this.userMouseOver}>
This means that as soon as we hover the mouse over this button we would see the button object appear in the console.
Detecting user type events in user form
We can detect user change event in a form with the onChange event. So, we first create an input user form.
The form can be created inside our render method of our component as before.
<form onSubmit={this.userSubmit}>
    <input type="text" onChange={this.userType} />
    <button>Submit</button>
</form>
The form above consists of an input tag of type text, so that the user can type inside it. Inside there is a submit button to submit the user input. Further, we have also attached an onSubmit event to the form tag itself in the beginning. The reason we have attached the onSubmit event to the form tag and not to the button tag inside it, is that we want to change the default behaviour of the user form.
The class methods for these events are shown below.
userType = e => {
  this.setState({
    name: e.target.value
  });
};
userSubmit = e => {
  e.preventDefault(); // This is to prevent the normal behaviour of the page that is to refresh on form submit.
  console.log("form submitted", this.state.name);
};
We change the name parameter of the state of the component by the value the user types in the field. And we prevent the default behaviour of the form which is to refresh the page. Instead we print “form submitted” into the console along with the entered name. This is how we would see the form action.
Create React App
As websites get complex with a number of components and large number of expected users, the recommended method is the standard create-react-app, the original js package developed and maintained by Facebook. Using this standard package has many benefits such as:
- Inbuilt babel (to convert jsx to html)
- Access to a development server
- Ability to use newer ES6 features
- Access to updated features which may allow enhanced security for the web app
- Keeping our code modular
- Access to build tools to keep our code leaner.
Before installing create-react-app, we need to install node.js on our system. Go to https://nodejs.org/en/download/ and download the latest stable version of node. I am using windows so I installed the windows version on my system. Check that you can run node from the command line by typing node –version in the command line and hit enter. If you could see the version of node in the output this means node has installed correctly.
D:\My Data\JS\React-Redux-Article>node --version
v12.14.0
Open VSCode and open the integrated terminal. Create a base folder and navigate to the folder from the command line of the integrated terminal. In our case, the base folder is called React-Redux-Article. Next you need to both install create-react-app and create an app called demoapp via the command line with the following command.
npx create-react-app demoapp
So the above command would look something like below

For more instructions visit https://create-react-app.dev/docs/getting-started/. The above command would take some minutes to complete. Once the demo app has been created, you would see messages such as below.

As suggested in the output above, if you cd into demoapp and run the command npm start, you would see the following open up in your browser at the server url http://localhost:3000/.
Also, if everything installed correctly, you would see the following folder structure from VSCode.
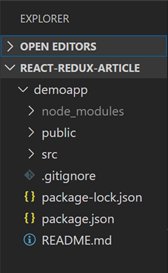
The node-modules folder contains all the files for the installed packages and dependencies for our app. The public folder is served to the browser. If you expand the public folder you would see an index.html page. The package.json keeps track of all of the different packages we have installed. The package-lock.json locks down the versions of the different packages installed.
The src folder is where we would develop the code for our demoapp. So what happens is that all our react components are kept in the src folder, and the components are injected into the index.html file in the public folder. If you open the index.html page in the public folder, you would see a div called “root”. This is where the react components would be injected by default.
  <body>
    <noscript>You need to enable JavaScript to run this app.</noscript>
    <div id="root"></div>
    <!--
If you open the file App.js in the src folder
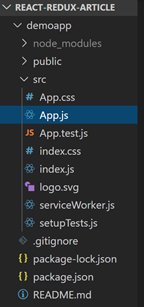
, you would see a function called App which is exported at the end.
export default App;
Next if you open the index.js file in the src folder, you would see the below line,
ReactDOM.render(<App />, document.getElementById('root'));
This is similar to what we saw in the cdn version of the react demo we discussed above. The App is imported from App.js and rendered at the div called root in the index.html file.
Before creating our components, we are going to change the look of our public index.html page displayed in the browser by default. We delete the App.css file and in the App.js file delete the reference for that file which is the following line.
import './App.css';
Also delete the App.test.js file. Delete the logo.svg file as well. Open the App.js file and delete the function based react component called App inside it. Modify the file so that we import components from react and then create a class based react component which looks like below.
import React, { Component } from "react";

class App extends Component {
  render() {
    return (
      <div className="App">
        <h1>Our first create react app!</h1>
        <p>Welcome folks</p>
      </div>
    );
  }
}

export default App;
Now if you rerun npm demoapp from the command line from within demoapp folder, you would see the following in your browser at http://localhost:3000/.

Nesting Components
Next we are going to demonstrate nesting of components to show the modularity of components.
If you are using VSCode, it is recommended that you install the extension ‘ES7 React/Redux/GraphQL/React-Native snippets’. After this from file->preferences->settings, setting.json add the following line.
    "emmet.includeLanguages": {
        "javascript": "javascriptreact"
    }
What this would allow you is that you can write boiler-plate code for your components with abbreviations. See the gif below. You can see that you can easily write boilerplate code for react class component just by typing rcc and pressing tab/enter.
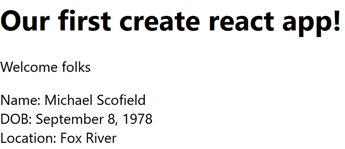
Now create a new file called Demo.js in the src folder. Open the file and create a boilerplate class based component as before. Modify the code so that it looks like below in Demo.js:
import React, { Component } from "react";

class Demo extends Component {
  render() {
    return (
      <div className="Demo">
        <div>Name: Michael Scofield</div>
        <div>DOB: September 8, 1978</div>
        <div>Location: Fox River</div>
      </div>
    );
  }
}

export default Demo;
Now, in App.js we are going to nest this component inside another component which we created before, the App component. First import Demo inside App.js by below.
import Demo from "./Demo";
To nest it inside the jsx of App.js we add the following line.
<Demo />
Now if we refresh the react app page on the browser, we would see the following.
Props
Since we have seen nesting of components, the next thing is props (short name for properties). Props are useful when passing values/data from a parent component to a child component. In our case the parent component is App and the child component is Demo. We want to pass props from App to Demo.
We pass props directly when we call Demo inside the App component. It can be passed as below. Note how, the <Demo > component has been called inside the jsx contained within the return method.
import React, { Component } from "react";
import Demo from "./Demo";

class App extends Component {
  render() {
    return (
      <div className="App">
        <h1>Our first create react app!</h1>
        <p>Welcome folks</p>
        <Demo
          Name="Michael Scofield"
          DOB="September 8, 1978"
          Location="Fox River"
        />
      </div>
    );
  }
}

export default App;
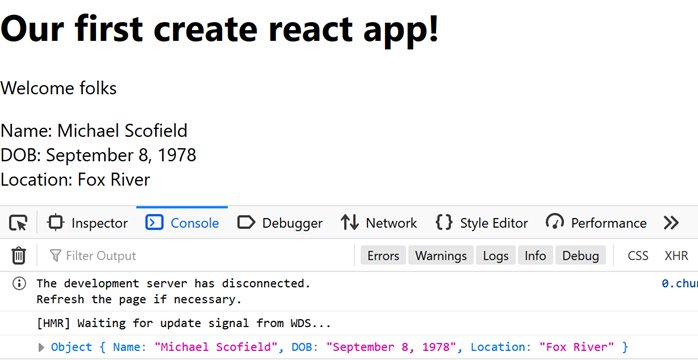
Inside the child component these props can directly be reference by “this.props”. For our example, in Demo.js we can log the props directly to the console as below with this.props.
import React, { Component } from "react";

class Demo extends Component {
  render() {
    console.log(this.props);
    return (
      <div className="Demo">
        <div>Name: Michael Scofield</div>
        <div>DOB: September 8, 1978</div>
        <div>Location: Fox River</div>
      </div>
    );
  }
}

export default Demo;
Now if we refresh our react app in the browser, in the console we can see these props.
In Demo.js, we can also directly render the props with the this.props references as below.
<div className="Demo">
  <div>Name: {this.props.Name}</div>
  <div>DOB: {this.props.DOB}</div>
  <div>Location: {this.props.Location}</div>
</div>
Or we could also directly get the props values by deconstruction and then use these values to render to the browser.
const { Name, DOB, Location } = this.props; // De-construction
    return (
      <div className="Demo">
        {/* Rendering the De-constructed values */}
        <div>Name: {Name}</div>
        <div>DOB: {DOB}</div>
        <div>Location: {Location}</div>
      </div>
    );
  }
This would still render the same thing in the browser as before.
The way props are useful is that we can pass different values to the child component as required and the child component would still be able to produce the same view but with different values as required.
Passing Lists as props
Instead of passing a prop object as before we can also pass a list of objects. First we create that list in the state object of the parent class, App.
class App extends Component {
  state = {
    app_state_list: [
      { Name: "X", DOB: "January 1, 1990", Location: "Dhanbad" },
      { Name: "Y", DOB: "January 2, 1990", Location: "London" },
      { Name: "Z", DOB: "January 3, 1990", Location: "NY" }
    ]
  };
Next in the render method of the App we pass this list to the child component Demo.
<Demo demoprops={this.state.app_state_list} />
The final App component (parent component) would look like below.
class App extends Component {
  state = {
    app_state_list: [
      { Name: "X", DOB: "January 1, 1990", Location: "Dhanbad" },
      { Name: "Y", DOB: "January 2, 1990", Location: "London" },
      { Name: "Z", DOB: "January 3, 1990", Location: "NY" }
    ]
  };
  render() {
    return (
      <div className="App">
        <h1>Our first create react app!</h1>
        <p>Welcome folks</p>
        <Demo demoprops={this.state.app_state_list} />
      </div>
    );
  }
}
In the Demo component (child component), we would receive this list of prop objects as the props.
const { demoprops } = this.props;
Once we receive this prop objects list into a list variable called demoprops, we would map each of these prob objects to a jsx object to create a list of jsx objects. See the example of the Demo component below.
import React, { Component } from "react";

class Demo extends Component {
  render() {
    const { demoprops } = this.props; // Receiving props
    const prop_list = demoprops.map(prop_object => {
      return (
        <div className="Demo" key={prop_object.Name}> // Map to jsx
          <div>Name: {prop_object.Name}</div>
          <div>DOB: {prop_object.DOB}</div>
          <div>Location: {prop_object.Location}</div>
        </div>
      );
    });
    return <div className="proplist">{prop_list}</div>;
  }
}
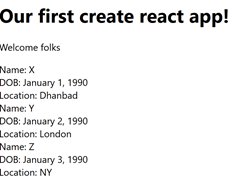
We use the JavaScript map method of lists to map each prop object to a jsx. This jsx object list is stored in the variable prop_list. Finally the render method just returns this list of jsx objects. Note that each of these jsx objects are contained in div with a className Demo and also have a key assigned to these divs. This means each jsx object is unique. Here the key could be any unique identifier for every div. Since, the name of the prop objects (X, Y, Z) passed from the App component was already unique we assigned prop_object.Name as the key.
If we refresh the react app in the browser, we would see the below.
Stateless components
Container components vs Presentational User Interface components. The presentational components are the stateless components and often receive data in the form of props from a parent component.
|
Container Components |
Presentational Ul Components |
|
- Contain state - Contain lifecycle hooks - Not concerned with UI - Use classes to create |
- Don't contain state - Receive data from props - Only concerned with UI - Use functions to create |

In our example above, the Demo component receives data from the parent App component in the form of props and does not have a state object. So the Demo component is an example of a stateless component. However, we still have created the Demo as a class based component. We need to convert this to a function based component. The following is the function version of the Demo component.
import React from "react";

const Demo = props => {
  const { demoprops } = props;
  const prop_list = demoprops.map(prop_object => {
    return (
      <div className="Demo" key={prop_object.Name}>
        <div>Name: {prop_object.Name}</div>
        <div>DOB: {prop_object.DOB}</div>
        <div>Location: {prop_object.Location}</div>
      </div>
    );
  });
  return <div className="proplist">{prop_list}</div>;
};

export default Demo;
Notice the changes above. First of all we need to explicitly pass the props through a props argument, as we are actually using an arrow function and if we need to pass data to a function then it has to be in the form of an argument. The props argument could have been called anything but we are calling it props just for the sake of comprehension. Also, we don’t need to import the { Component } from react anymore, so we have removed it.
const { demoprops } = this.props;
has been converted to
const { demoprops } = props;
. That’s because we only can use this is in class based objects. Another big change is that we got rid of the render method. The render was a method of the component class and is not required here as we would be directly returning the jsx from the functional component Demo. Because of this we also don’t need to import {Component} from react and hence we have removed it at the top.
Adding User Data with forms
We want to add a new state object to the parent component App state which is a list of objects called app_state_list. This state object would later be passed to the child component Demo as a prop to be rendered and displayed in the browser. So that the user can add a state from the browser we would need to create a user form. Create a new file in the src folder, and call it UserForm.js. Next put the below code in it.
import React, { Component } from "react";

class UserForm extends Component {
  state = {
    Name: null,
    DOB: null,
    Location: null
  };

  userFormFieldChange = e => {
    this.setState({
      [e.target.id]: e.target.value
    });
  };

  userSubmit = e => {
    e.preventDefault();
    this.props.addAppState(this.state);
  };

  render() {
    return (
      <div>
        <form onSubmit={this.userSubmit}>
          <label htmlFor="Name">Name:</label>
          <input type="text" id="Name" onChange={this.userFormFieldChange} />
          <label htmlFor="DOB">DOB:</label>
          <input type="text" id="DOB" onChange={this.userFormFieldChange} />
          <label htmlFor="Location">Location:</label>
          <input type="text" id="Location" onChange={this.userFormFieldChange}/>
          <button onClick={this.userSubmit}>Submit</button>
        </form>
      </div>
    );
  }
}

export default UserForm;
Basically the UserForm is a class based component which contains the jsx for the user form. This user form jsx is in the render method of the class. We have created 3 labelled user input fields for each parameter of our state object –Name, DOB and Location. We also create a local state for our UserForm component for these same parameters. What we want to perform is that whenever the user enters a text in these fields, the local state of the user form updates with these values. And when the user hits the submit button these local state values are passed and added to the state object list of the main App.js component.
Till now we have only passed data from a parent component to a child component by passing data as a prop. But the reverse could also be done. This could be achieved by passing a function from the parent component to the child component. The child component then calls this function from the received props and while calling the function it calls the function with an argument. The function is defined in the parent app and when it receives this data from the child as an argument, the function can then utilise this data to manipulate the state of the parent component.
In the user form above, whenever a user input field is changed it changes the local state of the UserForm component. All the form fields above have a onChange = this.userFormFieldChange method applied to them. So whenever a user types in these fields, the userFormFieldChange method is called. This method identifies the target id of the input tag of the input field. The target id is the state parameter name. So it identifies the state parameter from the input id and then updates the respective state parameter in the local UserForm state. When the submit button is hit, this calls the component method userSubmit, which has received the function called addAppState from the parent component via the props. This function is then called passing the local state as argument.
The below is how the parent component, App, looks like with the addAppState function.
import React, { Component } from "react";
import Demo from "./Demo";
import UserForm from "./UserForm";

class App extends Component {
  state = {
    app_state_list: [
      { Name: "X", DOB: "January 1, 1990", Location: "Dhanbad" },
      { Name: "Y", DOB: "January 2, 1990", Location: "London" },
      { Name: "Z", DOB: "January 3, 1990", Location: "NY" }
    ]
  };
  addAppState = app_state => {
    let state_list = [...this.state.app_state_list, app_state];
    this.setState({
      app_state_list: state_list
    });
  };
  render() {
    return (
      <div className="App">
        <h1>Our first create react app!</h1>
        <p>Welcome folks</p>
        <Demo demoprops={this.state.app_state_list} />
        <UserForm addAppState={this.addAppState} />
      </div>
    );
  }
}

export default App;
The addAppState function receives the argument as parameter app_state which is passed to an arrow function. We need to add this to the existing state of the App component. The was we add this is by first un-wrapping the existing state object (this.state.app_state_list) into an array with three dots (…) within the array square brackets. Because the array is a list, we can add a new element to it simply by a comma and adding that element (app_state). This new array list is stored in the variable state_list. Next we redefine the existing app_state_list parameter to the new value, state_list using the this.setState method.
After this is done, we can add the new state as shown in the image below.
Notice that as soon as the user types in one of the form fields, the corresponding local state of the UserForm component is updated. Once the user hits the submit button, the new state object is added to the existing state objects of the App component. Because the App component state which is a list, is rendered in the browser, as soon as a new state object is added to this list from the user form, you would be able to see the updated App component state object list in the browser.
Deleting state data
Before delving into this, just a recap of how our demo app works.
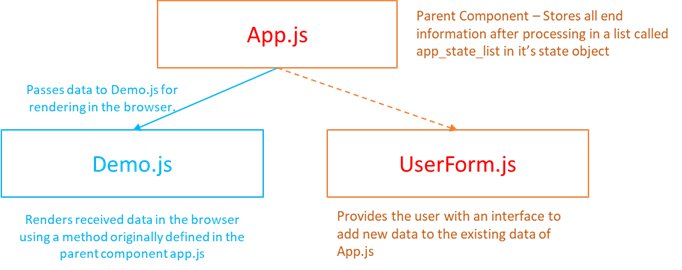
The App component is the main component and stores all the end information in its state object. Both the Demo and UserForm are child components embedded in the main app.js. The Demo component helps in rendering the end user information stored in the main component by returning a list of div containers for all the information. The user form produces an iteractive user form to add more information to the existing information of the parent component. Now we want to delete a state object with a button. So we would add a button for every state object. Since every state object of the main App is converted into individual render-able div containers in the Demo.js, the delete button would be defined in the Demo component. So the button would appear in the browser for every state object. Upon clicking this button the user would be able to invoke a method to delete this particular state_object. The Demo.js would look like below:
const Demo = ({ demoprops, delete_func }) => {
  // We have to stick with object deconstruction here because we are passing two objects as props from the parent component
  const prop_list = demoprops.map(prop_object => {
    return (
      <div className="Demo" key={prop_object.Name}>
        <div>Name: {prop_object.Name}</div>
        <div>DOB: {prop_object.DOB}</div>
        <div>Location: {prop_object.Location}</div>
        <button
          onClick={() => {
            delete_func(prop_object.Name);
          }} // Surround it with an anonymous function so that the function call is not made
        >
          Delete app state
        </button>
      </div>
    );
  });
  return <div className="proplist">{prop_list}</div>;
};

export default Demo;
You would see the button has been added and has an OnClick event assigned to it. The moment a user presses this button, an anonymous arrow function is called. This anonymous arrow function has a delete function called delete_func assigned to it. This delete_func is passed to the Demo component within the props. If you open the react component tab in the developer tools, you would see this function and demoprops in the props.

We use object deconstruction, ({ demoprops, delete_func }), in the react function component, Demo, argument so that the two props objects are automatically assigned to the demoprops list object and the delete_func function. These two prop objects are passed from the main component App.
The below is how the main component, App looks like.
import React, { Component } from "react";
import Demo from "./Demo";
import UserForm from "./UserForm";

class App extends Component {
  state = {
    app_state_list: [
      { Name: "X", DOB: "January 1, 1990", Location: "Dhanbad" },
      { Name: "Y", DOB: "January 2, 1990", Location: "London" },
      { Name: "Z", DOB: "January 3, 1990", Location: "NY" }
    ]
  };
  addAppState = app_state => {
    let state_list = [...this.state.app_state_list, app_state];
    this.setState({
      app_state_list: state_list
    });
  };
  deleteAppState = id => {
    //console.log(id);
    //We won't actually delete the item. Instead we would write a filter exclude method to exlude the item and re-save that
    let new_state_list = this.state.app_state_list.filter(state_object => {
      return state_object.Name !== id;
    });
    this.setState({
      app_state_list: new_state_list
    });
  };
  render() {
    return (
      <div className="App">
        <h1>Our first create react app!</h1>
        <p>Welcome folks</p>
        <Demo
          demoprops={this.state.app_state_list}
          delete_func={this.deleteAppState}
        />
        <UserForm addAppState={this.addAppState} />
      </div>
    );
  }
}

export default App;
Because we are using object deconstruction in the Demo app, the passed props have to be called exactly the same while the parent component, App, calls the Demo component. So, the demo props is the ‘app_state_list’ object of the App component and the ‘delete_func’ is the ‘deleteAppState’ method of the App component. The ‘deleteAppState’ method creates a new list from the ‘app_state_list’ by excluding the state object which has a name equal to the name of the state object where the user clicks the button, from the list. This new list, which excludes the delete button clicked object, is then stored back into the App state. This way we can achieve the delete function. To use exclude we use the filter method of JavaScript lists. The way filter works is that we assign a function which is called for every element of that list. If the function returns true then that element is retained in the new list. If the function returns false for an element then that element is excluded from the new list.
The delete function would work as shown below in the browser.
React Lifecycle Methods
A summary diagram of the different life-cycle stages of a react component is shown below. (Source: https://twitter.com/dan_abramov/status/981712092611989509/photo/1 )

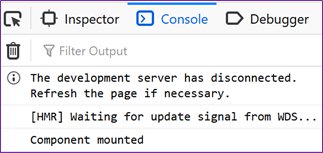
The coloured blocks are methods available for different life-cycle stages in the components. The different stages could be Mounting, Updating and Unmounting. We have already used the ‘render’ life-cycle method of the component before. The mounting is when a component is first loaded into the DOM. This could be checked via the ‘componentDidMount’ method in our App component. So if we insert the below method in our App.js, App component
  componentDidMount() {
    console.log("Component mounted");
  }
and refresh the browser we would see the message in the console.
Similarly we can perform an action whenever the App component updates with the ‘ComponentDidUpdate’ method. So if we add the method as shown below,
  componentDidUpdate(prevProps, prevState) {
    console.log("Component updated");
    console.log(prevProps, prevState);
  }
we would be able to see the previous props and previous state as soon as the App component is updated. To update the App component you can enter some dummy values into the user form and press submit. So you would see the below in the console.
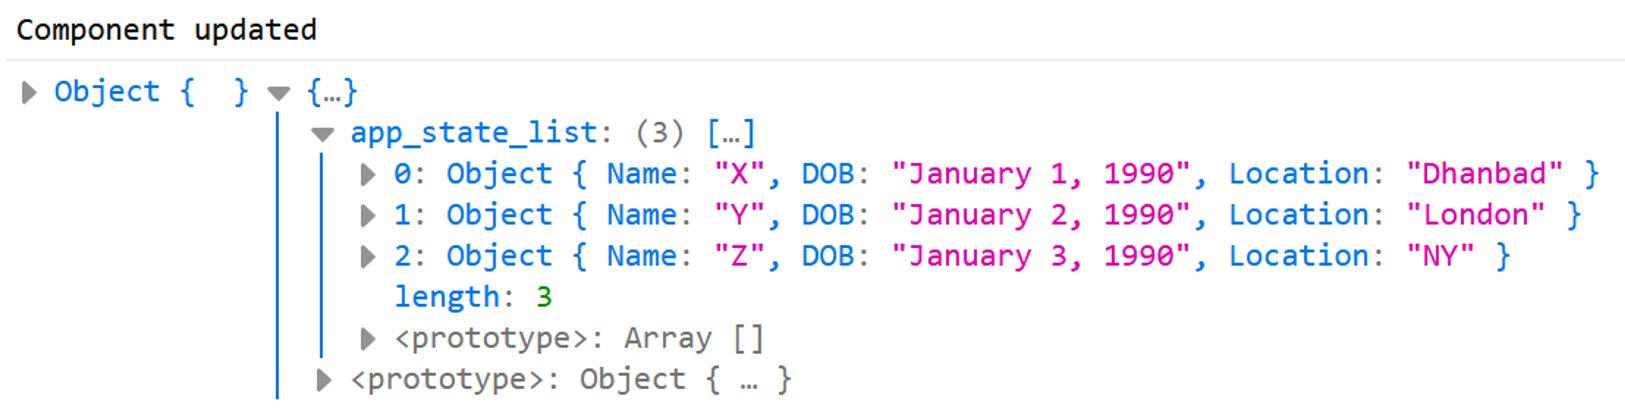
The first object is the previous props of the App component and is empty because this is the parent app and does not have any props passed down from a preceding component. The second one is the previous state of the App component before the user enters new values and hits submit.
The above are really simple applications of react lifecycle hooks but you can do more realistic applications such as update a database whenever a component updates during the life-cycle of a component.
I would later on add some concepts of Redux to this article. As of now, this concludes the hands-on guide to react. By the end of this article you would have gained a better understanding of React !
Post your comment