
Before we begin, let us setup the environment to test our JavaScript (JS). We would create an index.html page, and run the JavaScript when the page is loaded into the browser. To do so, we would load our JavaScript within the tags <script> </script> in our html page. Our html page would serve one more purpose, that is to also display 'Hello JavaScript' in the browser. We would be able to inspect what the JavaScript is doing behind the scenes, by going in the Developer Tool setting from our browser. We are using the chrome browser for this demonstration. In chrome, you can also open the developer tools by pressing 'Ctrl+Shift+I'. The JavaScript which would load within the script tags in our html file, would be saved separately in a file called 'testapp.js'.
To edit both the html file and js files above, we would use VS Code editor. Download and install it, if you don't have it installed on your system. We are going to install an extension called 'Live Server' on VS Code. Visit the official documentation of VS Code or google it, if you are not aware how to install extensions on VS Code. What this extension allows is to test our index.html instantly in the browser the moment we make any changes and save our code in the html and js files above. Once the extension has installed, create a new folder somewhere in your system and create two files - index.html and testapp.js in the folder. Open the html file and and put the below code.
<!DOCTYPE html>
<html lang="en">
<head>
  <meta charset="UTF-8">
  <meta name="viewport" content="width=device-width, initial-scale=1.0">
  <meta http-equiv="X-UA-Compatible" content="ie=edge">
  <title>Document</title>
</head>
<body>

  <h1>Hello JavaScript</h1>
  <script src = "testapp.js"></script>

</body>
</html>
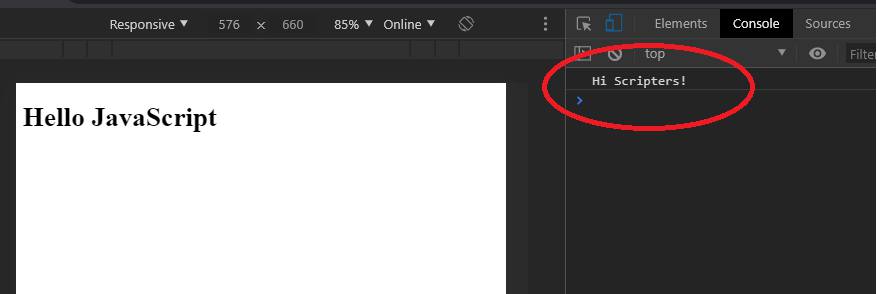
Now, in VS Code, save the file by pressing Ctrl+S. Now right click anywhere in the html file from VS Code and choose 'Open with Live Server' from the options upon right-clicking. This would open the url 'http://127.0.0.1:5500/index.html' in your default browser. If chrome is not your default browser, copy paste the above url in chrome. You should see 'Hello JavaScript' in your browser. Open the developer console discussed before, by pressing 'Ctrl+Shift+I' in the chrome window and choosing the Console tab on the right. Now, every time we save our html or js file in VS Code the browser window in chrome would be refreshed automatically. We would be able to see the output from our JavaScript in the browser window developer console tab. We would use the console.log function to output results to the developer console. For example, if we open the testapp.js file and add the line below and then save the file we would see the output 'Hi Scripters!' as follows in the developer console.
console.log('Hi Scripters!');
If you could see the above output in the developer console, then we are ready to test the ES6 concepts covered in this article.
Variables
The first concept we are going to cover is variables declarations and scope. In older JavaScript, you can declare a variable two times with 'var' and this would not produce an error on compile. So essentialy you could do something like below. The console would show 2 upon executing the below.
var x = 1;
var x = 2;

console.log(x);
The newer ES6 allows variable declarations with 'let' and 'const'. With const as the name says, you cannot change the value of the variable afterwards. In let you can change the value of the variable afterwards. However, in both let and const, you cannot re-declare the variables. So doing the below would produce errors.
//Produce errors
let x = 1;
let x = 2;

console.log(x);

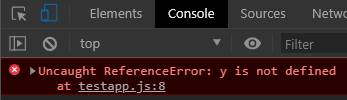
In terms of scope, older JS has global and function scope for variables. So in the below example, we cannot use the variable y outside the function.
//Produce errors
var x = 1;

function somefunc() {
  var y = 5;
}

console.log(y);
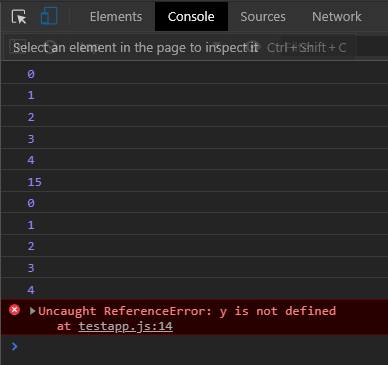
In ES6, we have an additional scope called block scope. This means variables declared (using let and const) within the scope of a block statement cannot be re-used outside. So in the below example, re-using the variable y outside the for loop would produce an error.
const list = [1,2,3,4,5];

for (var x =0; x < list.length; x++) {
  console.log(x);
}

console.log(x+10);

//Produce errors
for (let y =0; y < list.length; y++) {
  console.log(y);
}

console.log(y+10);
Concatenation
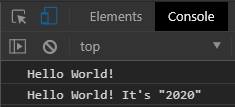
ES6 allows concatenation with variables inside a string. If you are familiar with the Python language, you would find that it is very similar. In older JS, we performed concatenation with a plus operator. In ES6 we use back-ticks (`) to perform concatenation with variables inside strings. See the example below.
//Older JS
var x = "Hello";

console.log(x+" World!");

//ES6
let y = 2020;

console.log(`${x} World! It's "${y}"`);
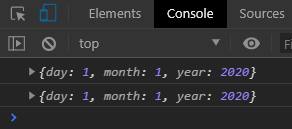
The output would be
Object Literals
This one is a simple concept. By object literals we mean key-value pairs of objects inside curly braces. This is similar to the structure of JSON, and dictionaries of Python programming language. In older JS, even if the key and values both are the same, we still need to repeat the key and value. In ES6, in the case, if the key and value are the same, we just need to define the key once and ES6 JS assumes that the value is the same as the key. This would be clear form the example below.
//Older JS
function GetDate(day, month, year){
  return{
    day: day,
    month: month,
    year: year
  };
}

console.log(GetDate(01,01,2020));

//ES6
function GetDateES6(day, month, year){
  return{
    day,
    month,
    year
  };
}

console.log(GetDateES6(01,01,2020));
We see that even without repeating the key-value pairs in the second syntax, we were able to get the same output.
Object Deconstruction
By object deconstruction, we mean that we want to access different parts of an object. Say for example, we have an object called Student with variables called Name and DateOfBirth. In older JS, to access individual parts we need to access them separately. See below.
//Older JS
var Student = {
  name : "Michael Scofield",
  DOB : "September 8, 1978"
};

var x = Student.name;
var y = Student.DOB;

console.log(x,y);
The same could be achieved in ES6 by deconstructing the object student in a single line. Note that for the single line deconstruction the name of the variables should be same as that of the variables of the object.
//ES6
let StudentES6 = {
  name : "Michael Scofield",
  DOB : "September 8, 1978"
};

let {name, DOB} = StudentES6;

console.log(name, DOB);
Both the above would produce the same output.

Arrow Functions
Consider the conventional way of writing functions in JS. In the example below, we first define a simple function which adds two numbers in older JS. Then we define the arrow equivalent function (() =>). Both these functions would produce the same output of 3 in the console.
//Older JS
function sum(x, y){
  return x + y;
}

console.log(sum(1,2));

//ES6
sumES6 = (x, y) => {
  return x + y;
}

console.log(sumES6(1,2));
The arrow function can be further simplified as shown below by getting rid of the curly braces and the return keyword. Note that this is only possible when we have only one statement within the function's curly braces.
//ES6
sumES6 = (x, y) => x + y;
We can further simplify arrow functions if the number of arguments is less than 2. See example below.
//Older JS
function IsPositive (x) {
  return x >0;
}

//ES6
IsPositiveES6 = x => x >0
Arrow functions are most useful when creating anonymous functions, that is, functions without a name. An example of using anonymous functions is while passing functions to another function. So imagine when you are adding a click event to an element on your page. The click event would trigger another function, which could be like the one in the example below. In this example, when the user clicks on the message 'Hello JavaScript', in our index.html page in chrome, the messsage changes to 'You clicked me'.
//Get the h1 html element
var h1tags = document.getElementsByTagName("h1")

//element.addEventListener(event, listener);

//Older JS
h1tags[0].addEventListener("click", function(){
  h1tags[0].innerText = "You clicked me"});

//ES6
h1tags[0].addEventListener("click", () => h1tags[0].innerText = "You clicked me");
Notice that we got rid of the function word in the listener function for the click event. Both the functions achieve the same effect, but with the arrow function we write lesser code. Arrow functions are very similar to lambda functions in the Python programming language.
Another difference between older JS functions and arrows functions apart from the simpler syntax is about the scope of the 'this' keyword. In older JS, 'this' refers to one level above it's current scope.
In older JS, 'this' refers to it's parent element. However in ES6 arrow functions 'this' does not refer to anything, unless the arrow function's parent element already has a 'this' object available, in which case the arrow function captures the 'this' value of the parent context.
This would be more clear from the example below. In the example, for older JS, the Student object has a function variable called PrintName. The function PrintName first prints the name of the student. PrintName has another function inside it called PrintDOB which prints the Date of Birth of the Student. However, PrintDOB cannot capture the this variable available to it's parent function. That's why we have to create another variable called that, after which the child function can access it's grandparent object's DOB by referring to that.
//Older JS
var Student = {
  name : "Michael Scofield",
  DOB : "September 8, 1978",
  PrintName: function() {
    console.log("The student's name is " + this.name);
    var that = this;
    var PrintDOB = function() { console.log("The student's date of birth is " + that.DOB)};
    PrintDOB();
  }

};

Student.PrintName()

//ES6
let StudentES6 = {
  name : "Michael Scofield",
  DOB : "September 8, 1978",
  x: name,
  PrintName: function() {
    console.log("The student's name is " + this.x);
    var PrintDOB = () => { console.log("The student's date of birth is " + this.DOB)};
    PrintDOB();
  }

};

StudentES6.PrintName()
In the ES6 example, the PrintDOB function can capture the 'this' object directly because it was available to it's parent function. Please note that for everything discussed in this section, the parent context is defined by from where a child function is called and not from where a child function is defined/written in code.
Function default argument values
In older JS, strange it may seem, but we cannot provide default values of the function parameters directly after the arguments. To achieve this we have to resort to other clever ways such as below. For example, in the example below, if we wanted to set default values of 1 to x and y, within the function we define two dummy variables a and b which have values either provided by the user (x y) or 1. Then we can call the function without specifying the values of x and y and the function would return a value 1.
//Older JS
function multiply(x, y) {
  var a = x || 1;
  var b =  y || 1;
  console.log(a * b);
}

multiply();
In ES6, we can provide default values just like functions in many other programming languages i.e right after the arguments in the function definition. Now if we call the function multiplyES6 without specifying any values for x and y, the function would assume the default value of 1 for both x and y and would produce an output of 1.
//ES6
function multiplyES6(x = 1, y = 1) {
  console.log(x * y);
}

multiplyES6();
Constructor functions
In older JS, constructor functions allow us to create objects in an object oriented way (similar to Object Oriented Programming - OOP in C++, Python etc.). Similar to OOP, constructor functions allow us to inherit object properties as well. To create object methods (functions), in older JS, we use the prototype technique. What this means is that the object variables are defined inside the constructor function but the object methods are created separately outside with the prototype technique. See the example below.
//Older JS
//Original object contructor function and method
function Student(name, DOB, RollNo){
this.name = name;
this.DOB = DOB;
this.RollNo = RollNo;
}
Student.prototype.PrintDetails = function () {
console.log("Student name is " + this.name);
console.log("Student DOB is " + this.DOB);
console.log("Student RollNo is " + this.RollNo);
}
//Inherited object contructor function and method
function StudentInfo(name, DOB, RollNo, GuardianName, Address){
Student.call(this, name, DOB, RollNo);
this.GuardianName = GuardianName;
this.Address = Address;
}
StudentInfo.prototype = Object.create(Student.prototype)
// Create object and print details
const student1info = new StudentInfo("Michael Scofield", "September 8, 1978", 4, "Aldo Burrows", "Fox River")
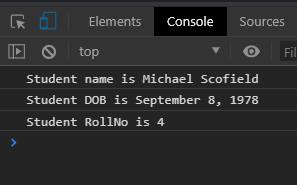
student1info.PrintDetails();
To inherit the parent object constructor function methods we have to use the prototype technique again. The output of the above is shown below.
In ES6, we can achieve the same but with a more elegant class object method. Inside the class object we first create the object variables with a 'constructor' method. The object methods can then be directly added below this. While inheriting, we need to first use the 'extends' keyword to inherit from the parent class. Next, inside the inherited object's constructor method we need to initialize the parent objects variables via a 'super' method. The parent objects user created methods can directly be inherited into the child object. See, example below.
//ES6
//Original class and method
class StudentES6{
constructor(name, DOB, RollNo){
this.name = name;
this.DOB = DOB;
this.RollNo = RollNo;
}
PrintDetails(){
console.log("Student name is " + this.name);
console.log("Student DOB is " + this.DOB);
console.log("Student RollNo is " + this.RollNo);
}
}
//Inherited class and method
class StudentInfoES6 extends StudentES6{
constructor(name, DOB, RollNo, GuardianName, Address){
super(name, DOB, RollNo);
this.GuardianName = GuardianName;
this.Address = Address;
}
}
// Create object and print details
const student2info = new StudentInfoES6("Lincon Burrows", "17 March, 1970", 1, "Aldo Burrows", "Fox River")
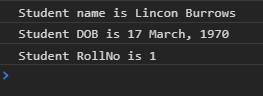
student2info.PrintDetails();
This would produce the output below.
Promises
The last concept we are going to cover is promises. The equivalent method in older JS is callbacks. The way a callback works is that we ask a JS function to perform a task. The task may take some time to complete. When the task is finished, the callback function sends back a signal in the form of data back to the user. To simulate this in a JS function, we could use the setTimeOut function. The setTimeOut function, performs a user defined function after waiting for the time specified. The syntax for setTimeOut function is
setTimeout(function, milliseconds, param1, param2, ...)
where param1, param2 etc are optional.
As per Mozilla MDN,
A callback function is a function passed into another function as an argument, which is then invoked inside the outer function to complete some kind of routine or action.
Put simply,
a callback function is a template function we specify as argument to another function which would be invoked inside that outer function.
Below is our demo callback functionality. It's a bit tricky to understand at first. However, you would understand it once you go through it once or twice.
//Older JS

function FetchData(DataKey, democallback){
    setTimeout(function (){
      console.log("Fetching data for key "+DataKey+ " from the database");
      democallback({ obtaineddata: Math.random()});
    }, 2000)
}

FetchData(5, function(x){console.log(x)});
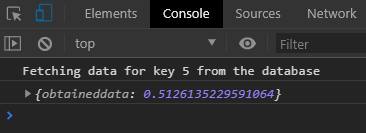
We want a function FetchData to send us a call back by outputting obtained data in the console when it has finished fetching data from the database . The DataKey is the value for which we want to retrieve data. To simulate database extraction we are just using the random function to return any random value and also waiting for 2 000 miliseconds (2 seconds) to complete the operation. After 2 seconds, the obtained random data is sent to the democallback function in the form of an object literal. The object literal is the value which is passed to the function in the democallback variable .
We actually perform a callback with the above function by providing a DataKey of 5 and passing a function (which would output in the console). In the FetchData function, the object literal is passed as value of argument x of the function inside the variable democallback. The output would look something like below.
A callback function is asynchronous, which means that the code would not wait for the callback function to finish, before moving to the next line. The JS code would run asynchronously, that is the result of the callback function can be obtained later on.
The equivalent of call backs in ES6 is promises, which allow a more elegant method of performing callbacks. Also, it is possible to catch errors. As per Mozilla MDN,
The Promise object represents the eventual completion (or failure) of an asynchronous operation, and its resulting value.
In a promise constructor has two arguments resolve and reject. Both these arguments accept functions, that is what function to perform upon successful completion (resolve) and what function to perform on failure (reject). Whether the operation was successful or unsuccessful can be decided inside the promise construct. Note that unlike the callback function, which could be called anything, the resolve and reject function arguments cannot be changed. A promise construct function could be as simple as below.
const prom = new Promise ((resolve, reject)=>{
  let obtaineddata =  Math.random();
  if (obtaineddata <= 0.5)
    {reject(obtaineddata)}
  else
    {resolve(obtaineddata)}
})
In the above construct, a new promise object is created and assigned to prom. The promise object finds a random number between 0 and 1. If the random number si below 0.5, it rejects with the obtained data. If the obtained random number is greater than 0.5 then it resolves with the obtained data. What this means if that if the obtained random number is below 0.5 it invokes the function in the reject argument by passing the obtained data to that function. Similarly if the obtained data is greater than 0.5 then it calls the function in the reject argument by passing the obtained data to that function. The promise object prom, could be called as below.
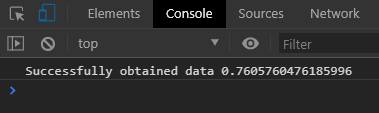
prom.then((x)=>{console.log(`Successfully obtained data ${x}`)}).catch((x)=>{console.log(`Error obtaining data. Obtained data ${x} was below cutoff 0.5`)})
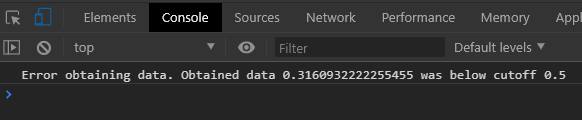
What this is saying that if the promise object call resolved (i.e in our case if the random number was greater than 0.5) then call the function inside the 'then' construct. If the promise object call was rejected, i.e. if an error was encountered with the promise call then call the function inside the 'catch' construct. The good thing about the reject method is that in case of any unexpected kind of error the reject method would still be called and the function inside the catch construct would be passed the error value (instead of the obtained data in our case.)
The outputs from our promise calls would look like below.
Successful call
Unsuccessful call
Note that we can perform multiple serialized resolve statements by doing multiple else-ifs in our promise construct. If we want to pass a value to the promise construct then we can do that by wrapping our promise construct in the return statement of a function to which we pass the values. See, the demo example below.
const FetchDataES6 = function(DataKey) {
  setTimeout(() => {console.log("Fetching data for key "+DataKey+ " from the database")}, 0);
  return new Promise ((resolve, reject)=>{
    let obtaineddata =  Math.random();
    if (obtaineddata <= 0.5)
      {reject(obtaineddata)}
    else
      {resolve(obtaineddata)}
  });
}

FetchDataES6(5).then((x)=>{console.log(`Successfully obtained data ${x}`)}).catch((x)=>{console.log(`Error obtaining data. Obtained data ${x} was below cutoff 0.5`)})
In the above example, we can pass a DataKey to our promise construct just like we were doing in the callback functionality discussed before.
This finishes our coverage of the ES6 tricky concepts. There are many other concepts in JavaScript which are not covered in this article. I covered only those concepts which are heavily used in JS terminology especially in applications built with Node and React and are the most trickiest to understand at first!
This article should help you get up and running with JavaScript in no time.
Post your comment